
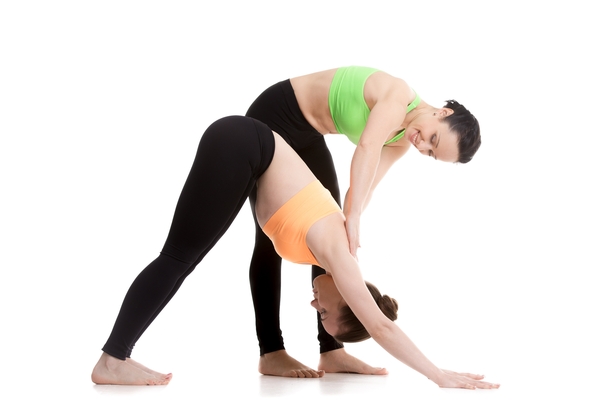
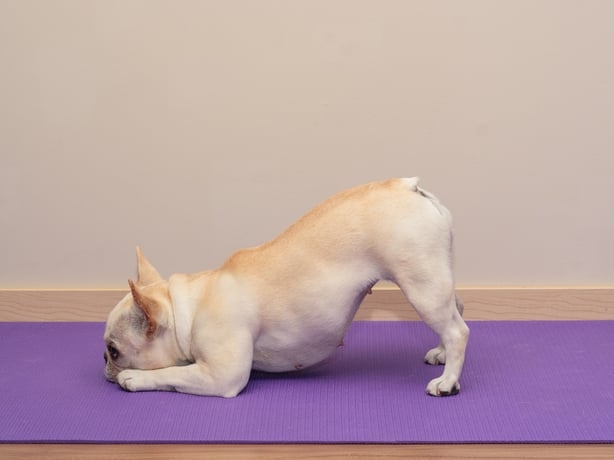
Every month our resident Yoga Bear talks us safely through one of the most regular yoga poses so that you know you're doing it right. This month it's Downward Facing Dog.
Trying to listen to alignment cues in a yoga class and understanding the right positioning can be overwhelming. Especially if you’re a complete beginner and simply trying to just keep up!
That’s why every month I will break down a pose, show you how to get into it safely, highlight its benefits and offer one or two top tips. This month, we are focussing on Downward Facing Dog, also referred to as Adho Mukha Svanasana in Sanskrit.
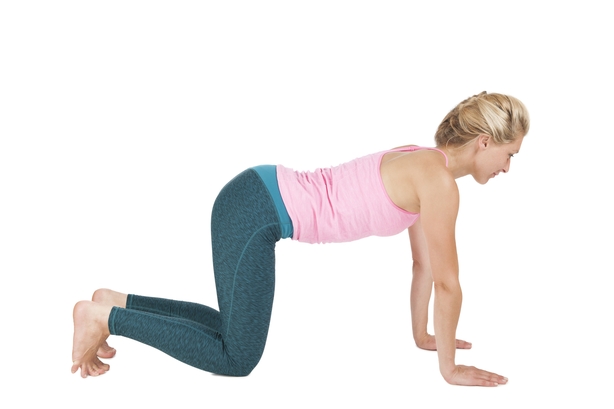
Establishing the Foundation of the Pose
- Begin on the floor on hands and knees
- Align your knees directly beneath your hips and your hands slightly forward from your shoulders and shoulder distance apart
- Look at the crease at your wrists and make sure they are parallel with the top edge of the mat
- Spread your fingers wide with the middle finger pointing towards the top of the mat
- Distribute the weight evenly across the palms, pressing a little more into the base of the index finger and thumb to relieve any strain from the outer wrists
- Inhale as you turn your toes under and engage your tummy muscles
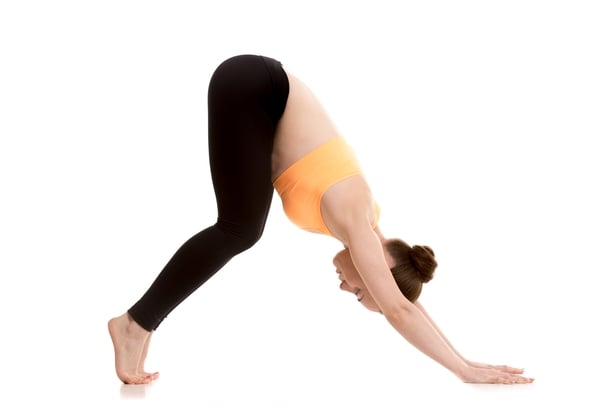
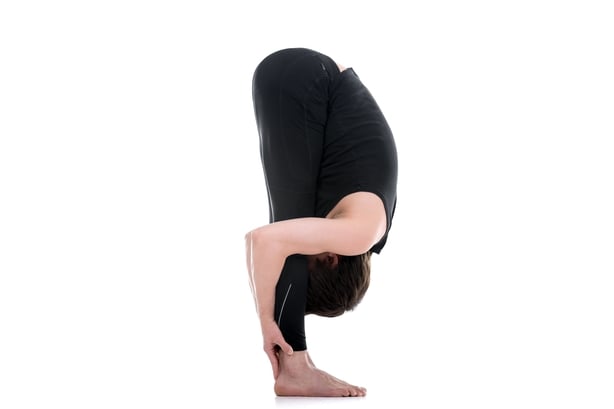
Moving into the Pose
- As you exhale, lift your knees from the floor
- Keeping a slight bend in the knees and heels lifted from the floor, extend the hips up and back
- Encourage the chest towards the thighs, keeping the gaze at the navel
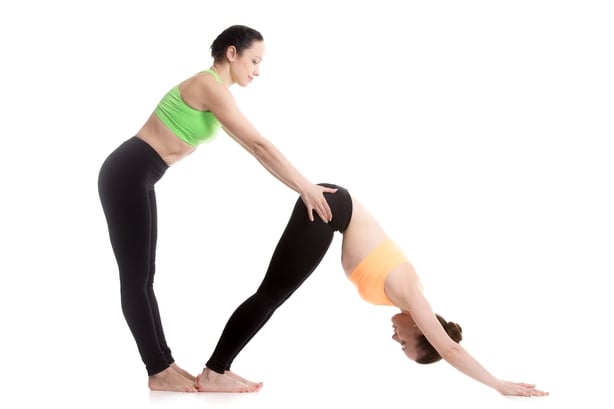
- Gently press the sitting bones of the buttocks back and up while lengthening through the spine, moving the hips back and up
- When you reach maximum spinal extension, maintain the position of the upper body as you begin to press the heels towards the floor, straightening the legs only as much as is possible
- If the soles of the feet come to the floor easily, step back a little for more of a challenge.
Maintaining the Pose
- Firm the outer arms, rotate the shoulders externally so that the upper arms move away from the ears, the biceps face forwards and the shoulder blades almost wrap under the armpits
- Press actively into the base of the index fingers
- Let the crown of the head move closer to the floor to give length to the neck but don’t let it hang
- Stay here for a couple of breaths
Completing the Pose
- Inhale and, as you exhale, look up between the hands
- Walk, step or hop your feet towards your hands at the top of the mat into a forward fold
- Slowly curl yourself up to standing, head last
Benefits of the Pose
- Stretches the arches, calves, hamstrings, hands and shoulders
- Strengthens the arms and legs
- Can be calming
Don’t do it if…
- You suffer with severe wrist pain or Carpel Tunnel Syndrome (maybe try it with your hands against a wall at hip level)
- In the late stages of pregnancy
- If you experience high blood pressure or headache – support your head with a bolster or block with the ears level between the arms