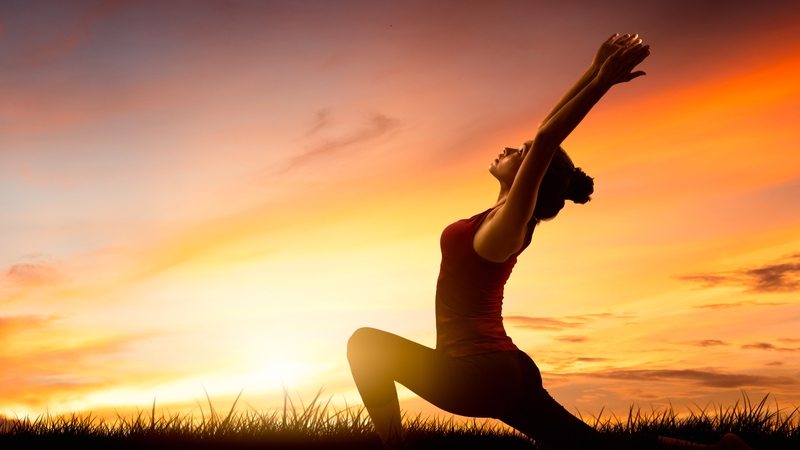

The clocks change this weekend! Hooray! Bring on brighter evenings and longer days! As we welcome actual spring (we think) and wave goodbye to the snow (we think), it’s time to express some gratitude to the sun. Step forward, the sun salutation also known as Surya Namaskar.
Why?
Literally meaning ‘salute to the sun’, surya meaning ‘sun’ and namaskar meaning ‘salute’, this asana sequence is a fantastic way to initiate a home practice.
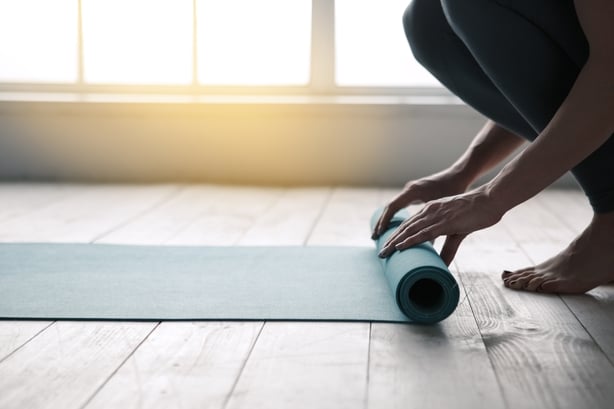
Think about it, you’ve been going to class regularly but want to start doing a little yoga yourself at home. It can be a bit daunting stepping on to the mat without the guidance of a teacher. How will you know what poses to do and when to do them?
The Sun Salutation sequence is easy to learn, easy to modify, easy to build on and is a great workout for the whole body making it physically beneficial for the practitioner. The fact that it is easy to learn and can be repeated many times brings benefits beyond the physical.
Moving through the repetitive sequence means the mind is focusing on the movement of the body alone. As the mind relaxes into the flow, the sequence can become quite meditative.
What?
The basic Sun Salutation consists of twelve ‘stations’ across eight poses. The first four poses are repeated at the end in reverse order.
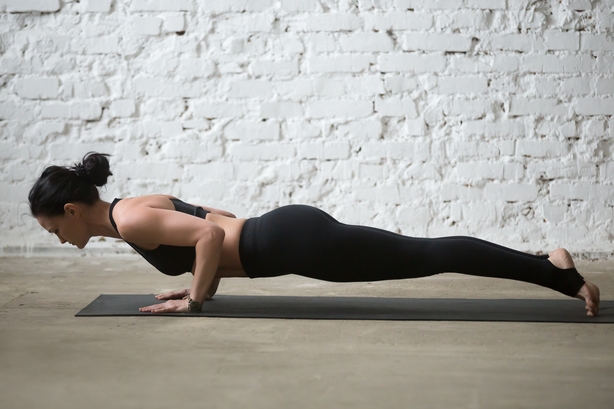
Beginning with Tadasana or Mountain Pose, move through Urdhva Hastasana (Upward Salute), Uttanasana (Standing Forward Fold), Anjaneyasana (Low Lunge), Kumbhakasana (Plank Pose), Chaturanga Dandasana (Four Limbed Staff Pose), Urdhva Mukha Svanasana (Upward Facing Dog) or Bhujangasana (Cobra), Adho Mukha Svanasana (Downward Facing Dog) and then stepping forward into your low lunge, forward fold, upward salute and mountain pose to finish one round. Then repeat on the other leg to complete the set.
As you move from posture to posture, observe your breath. Each transition occurs on either an inhalation or an exhalation. Breathing is always through the nose and if it becomes too difficult to move with the breath, take a break and begin again when the breath has slowed to normal.
How?
The philosophy behind the sequence lies in the opportunity to express gratitude to the sun, without which life on earth would be impossible and so, it is best practiced in the morning as the day begins on an empty stomach. An alternative practice for evenings would be a Moon Salutation of Chandra Namaskar.
One set of sun salutations consists of two rounds - the first, starting with the right leg and the second with the left. Ideally, the sequence is practiced in sets so that both sides of the body are used equally. As a beginner, it is a good idea to begin with one or two sets and gradually build on that.
Go as fast or as slow as you wish. Different tempos will have a different effect on the body and the mind. Slowing the pace can help to strengthen and tone the body, build awareness towards which muscle groups are firing and also bring more awareness to the breath and work on coordinating the breath with the movement. A faster pace can generate heat within the body and works well as a warm up and a cardiac work out.
Modifications & Variations
After attending yoga classes regularly, you will begin to learn the basics of each of the individual poses in a Sun Salute. These can then be weaved together and learned off so that a basic Sun Salute will become second nature to your home practice.
Overcoming obstacles in the flow is fairly straightforward too. Common stumbling blocks for beginners include lowering from Plank Pose to Chaturanga Dandasana. This requires serious core and upper body strength. A handy modification for this is to lower the knees to the ground first followed by the chest and chin before sliding forward into Cobra Pose or Up-Dog
Stepping forward from Down Dog to a Low Lunge can also prove tricky in the early stages of practice. Again, lowering the knees from Down Dog and stepping the foot forward between the hands by-passes this issue until the body becomes stronger. The back knee can then be lifted for Low Lunge.
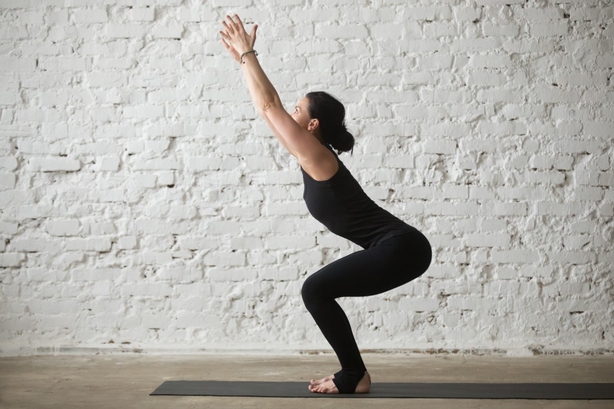
Once the practitioner becomes comfortable with the sequence, other poses can be added to create a ‘flow’. The sequence lends itself to the addition of more advanced poses such as Utkatasana (Chair Pose), Virabhadrasana II (Warrior II) or Utthita Trikonasana (Triangle) and beyond!
Remember…
Consistency is key. It’s more beneficial to do a short sequence every day rather than a long sequence now and then. Even ten minutes in the morning is a great way to start your day!
As a beginner, remember to take it slowly. Be conscious of your alignment and aim to build awareness around how each pose feels and how you feel overall before and after practicing. As the body gets tired, movement can become sloppy so remember to move mindfully but, more importantly, get moving!