

Analysis: Graphic Recording is a way of capturing information using a combination of single words, bullet points, doodles and directional arrows
One of the usual recommendations for studying is to make your own set of notes on a topic. Interacting with information by handwriting notes or making visual marks (like highlighting sections, using Post-Its and coloured tabs) helps you really understand it and make connections to other things you know. This also applies to meetings in your workplace.
But what if there was a faster, more concise way of making notes? One that included visual elements like colours and images? Something that could be tailored exactly to your needs? There is. It’s called Graphic Recording or SketchNoting.
From TEDxUFM, Rachel Smith on using drawings to take notes
What is Graphic Recording?
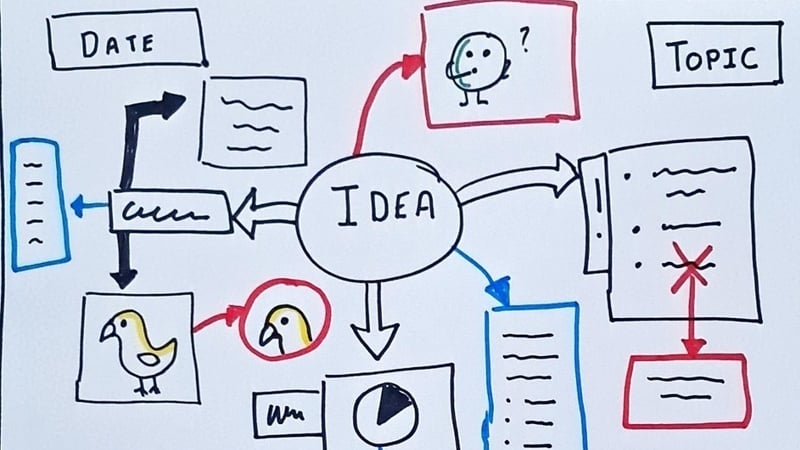
Graphic Recording is a way of capturing information using a combination of single words, bullet points, doodles and directional arrows. It is usually done in the moment so think of it as an on-the-go flowchart or infographic, one that can be reviewed and added to after the class.
If you're keeping the notes for a long time, some people like to build new drawings as part of their review process. In these new drawings, they can include other bits of information that they’ve come across on a topic or they may condense their different sets of notes on a topic into a new set of drawings.
What materials do you need?
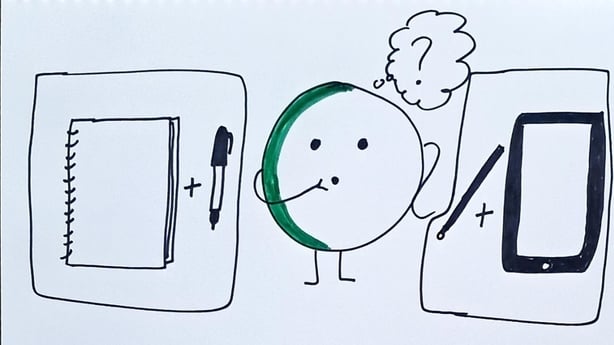
The simplest materials for taking notes are pen and paper. Pencils can also be used if you find the marks easy to read.
For people who need to use digital tools, there are many different notetaking apps available for use. Depending on the equipment you need, you may be able to use a stylus with a tablet and a programme that supports you drawing, writing or annotating text that you capture. You could also concentrate on capturing the information first, and then adding in diagrams, shapes, highlights etc to the text when you're reviewing your notes.
How to sketch your notes
There are two main ways to take graphic notes: freeform or with a template.
Freeform graphic notes
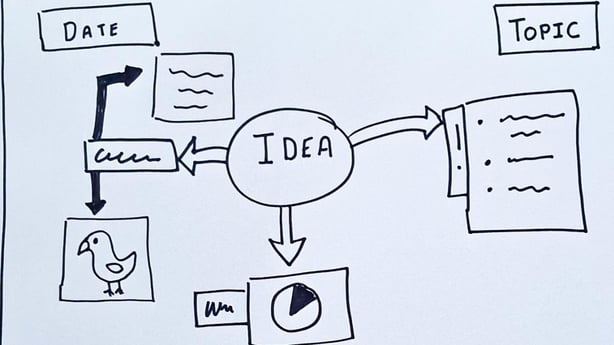
In a freeform graphic note, you generally start in the centre of the page and add information around the centre image or heading. There are no restrictions on the shape the information takes, and you're free to place doodles, arrows, and text wherever you want. Each freeform drawing is unique and cannot be replicated.
Graphic notes with a template
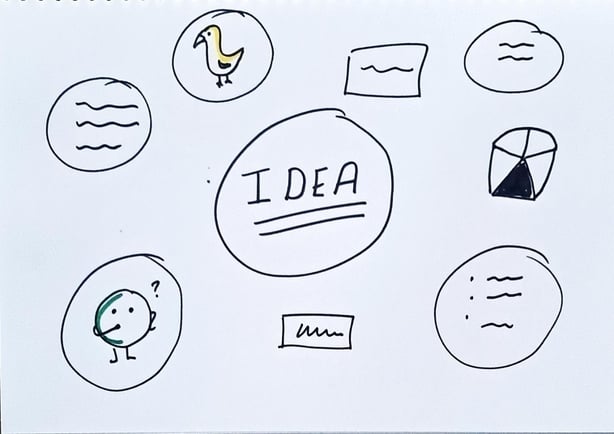
With a template, you generally decide on the kind of information you want to capture first (date, type of notes, actions, etc) and mark out a space for that information on the page before you begin taking notes. By using a template, you can prep your pages in advance, so there's less information for you to manage when you’re writing during the class.
Drawing your notes
Whichever way you take graphic notes, the first step to take is to turn your page sideways, from a vertical to a horizontal layout. If you’re using a digital equivalent, then change the layout settings from portrait to landscape.
For English language users, we tend to use vertical page layouts for large chunks of text, for making lists and generally putting information into a linear sequence.
By changing your page from a vertical to a horizontal orientation, you’re immediately breaking that automatic process of putting information into linear order. That leaves you space, both mentally and on the page, to add in connections between pieces of information.
Freeform graphic notes
- Take a blank piece of paper and a pen (or digital equivalent).
- Turn the page or screen sideways.
- Start in the middle of the page with a big heading or a quick doodle.
- Write different pieces of information around the central heading or image.
- Review the drawing and add in links between different pieces of information, or highlight which pieces are the most important using colour, size of arrows etc.
Graphic notes with a template
- Take a blank piece of paper and a pen (or digital equivalent).
- Turn the page or screen sideways.
- Decide on the pieces of information you need to capture.
- Mark out spaces for this information with boxes that have headings to show what information goes there.
- Add a circle or box in the middle of the page for a big heading or a quick doodle.
- Write different pieces of information around the central heading or image.
- Review the drawing and add in links between different pieces of information, or highlight which pieces are the most important using colour, size of arrows etc.
Using Graphic Recording to make notes in a class or meeting may seem daunting at first. As with any skill, a bit of practice in a relaxed setting can really help. Maybe try drawing some notes while listening to a podcast or video first? That way you'll have a good idea of how fast you can record information. You’ll also have a chance to develop your own visual library of doodles, arrows and other shapes. Try using everyday icons from signage, smartphones, and objects around you for inspiration.
Follow RTÉ Brainstorm on WhatsApp and Instagram for more stories and updates
The views expressed here are those of the author and do not represent or reflect the views of RTÉ