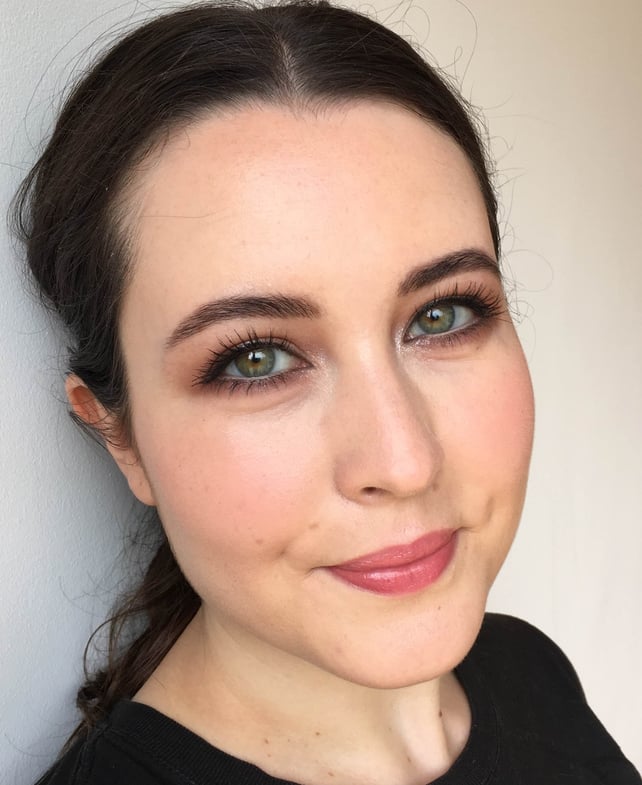
Having watched too many makeup tutorials to mention, I've come across a fair few makeup tricks and tips which have really improved my application techniques. To save you the bother of trawling through YouTube, here are some of the best tips I've picked up so far.
First things first...
This may seem like an obvious one, but always apply your eye makeup first, before doing anything with your complexion other that cleansing and moisturising. This means that any fall-out from eyeshadows, or eyeliner/mascara mess-ups can easily be cleaned up before you move onto your base. It's a great time saver!
1. Creating a flawless base
After applying a primer followed by liquid foundation with a dense foundation brush, I love to bounce a damp Beauty Blender sponge over my face to really work the product into my skin and remove any streaks. An amazing tip is to spray your Beauty Blender or blending sponge with makeup setting spray rather than dampening it with water. This will ensure foundation lasts amazingly well throughout the day, especially when you put a light dusting of powder over the foundation.
2. Spot concealing
I've picked up many tips from the amazing Lisa Eldridge, but my favourite has to be her approach to concealing. First, use a sheer layer of foundation to even out your skin without creating a mask-like effect. Then go in with an opaque cream concealer with a tiny brush and conceal any spots or blemishes you might have with pin-point precision. Blend the edges of the concealer with a fluffy eyeshadow brush such as the MAC 217, and once you've finished, set any of the areas you have concealed with a light dusting of powder.
3. Having trouble with your cat-eye flick?
Like most makeup lovers, I struggle with perfecting feline winged eyeliner, but one tip that I've found really useful is to first draw out the shape of the cat-flick with a kohl pencil before going in with my gel or liquid eyeliner. The kohl base gives your eyeliner something to stick to, and makes sure the line is priest's socks black too. It's also very useful to have a cotton bud dipped in micellar water to correct any mistakes and to sharpen the line.
4. Contour on fleek
Contouring is all the rage these days but it's much too easy to get wrong. I find that it's best to lightly dust any areas you want to contour, such as the hollow of the cheekbones and the temples, with a setting powder before going in with your contour shade (which, by the by, should lean towards a neutral rather than a tan colour). This makes it much easier to blend and avoids the contour looking patchy on the skin and sticking to foundation.
Being in possession of quite a round face with little in the way of cheekbones, one of the greatest tips I've picked up is to contour in a C shape down the hollow of my cheekbone and then bring it upwards towards my nose, so it cups my cheeks. This nicely outlines my cheeks and gives the appearance of a more sculpted face.
To meld together your eye-makeup with your contour, use a small fluffy brush to run a light dusting of your contour product from the inside hollow of the eye down your nose. This is quite a satisfying trick that also makes your nose appear narrower!
5. Define eyes subtly
If you don't have the patience/time for a cat-eye flick, an excellent tip I've picked up is to line the top waterline with black gel liner, either a pencil or using a small brush and pot of liner. I also like to do a tiny line close to the top lashes, which gives the appearance of bushier eyelashes with great ease. This is a great tip for brides who want to make their eyes pop without going for a very winged-out liner.
6. Get bushier brows
If your brows have fallen victim to over-plucking and you want to create the appearance of a fuller brow, brush a brow gel through the hairs first, then go in with either a powder or pencil to fill in any gaps in the brows. The gel gives the coloured product something to adhere to, and if you use light, hair-like strokes when applying the powder or pencil, you can create a very natural finish.
7. Create a youthful flush
As a rule of thumb, I tend to only apply cream on cream products, and powder on powder, which means they blend easier together, but one tip I've found indispensable is to apply a cream blusher on top of your finished, powdered makeup look with a fluffy powder brush. It's a tip I picked up from Adele's makeup artist Michael Ashton – he uses the Maybelline Dream Touch Blush on the apples of her cheeks to create a really youthful finish. Using a fluffy powder brush to apply the product also creates an airbrushed effect.
Here's a simple makeup look I created using these techniques.


